Introduction
If you’ve ever found yourself stumbling outside before dawn—or worse, in the middle of a freezing rainstorm—just to open or close your chicken coop door, you already know how inconvenient and unpleasant it can be. That’s where automatic chicken doors come in handy. These smart, little devices are absolute game-changers for backyard chicken keepers and small farm owners alike.
Imagine not having to worry about your flock every evening or morning. Automatic chicken doors provide just that peace of mind by automatically opening and closing at set times or in response to light levels. But as with anything that involves tech, motors, and programming, there’s a bit of a learning curve.
This guide breaks down everything you need to know—from what they are and how they work, to installing, programming, and even troubleshooting common problems. You’ll also find DIY tips and answers to real user questions. Whether you're just starting or you're trying to fix your current system, this guide has you covered.
What is an Automatic Chicken Door?
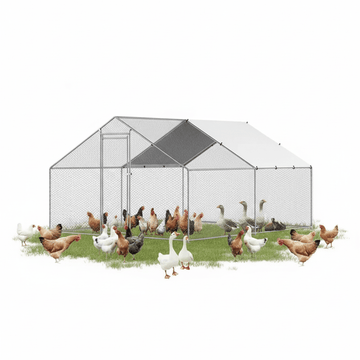
An automatic chicken door is essentially a motorized entry/exit point for your chicken coop. It opens and closes based on a preset timer or light sensor that detects sunrise and sunset. These doors are designed to keep your flock secure from nighttime predators like foxes, raccoons, or even stray dogs, while also offering the convenience of automation.
They come in various forms—some are battery-operated, while others plug into a power source or even solar panels. Most are weather-resistant and made to withstand the elements, which is especially important in cold or rainy climates.
Think of it like having a personal gatekeeper for your chickens—one who never sleeps and is always on time. With automation, you don’t need to be physically present every time the door needs to open or close. This can be a game-changer for people with full-time jobs, busy lifestyles, or those who travel often.
And for the tech-savvy crowd, modern doors can also connect to apps or home automation systems. So yes, chicken keeping just went 21st century.
How Does an Automatic Chicken Door Work?
The core working principle of an automatic chicken door lies in automation powered by either timers or sensors—sometimes both. Let's break it down into digestible components:
-
Sensors: These can be either light sensors that detect dawn and dusk or motion sensors. The most common are photoresistors that open the door at first light and close it once it gets dark.
-
Timers: These allow you to set specific open and close times. Useful if you want the door to open at 6:00 AM regardless of the sunrise.
-
Motorized Mechanism: Usually powered by battery or DC adapter, the motor raises or lowers the door using a pulley or sliding system.
-
Control Box: This is the brain of the system. It houses the logic board, settings menu, and override buttons.
-
Manual Override: A critical feature that lets you open/close the door manually when needed.
The door functions by reading the input from its sensor or timer and then triggering the motor to perform the corresponding action. If you’re using a high-end model, it may include weather resistance, freeze detection, and memory settings that retain configurations even during power loss.
Some doors also come with safety stops. So if a chicken happens to be under the door as it closes, the door will detect the obstruction and either stop or reverse.
In short, these systems are like smart garage doors—but for chickens.
Why You Need an Automatic Chicken Door
Let’s be real—chicken keeping is fun, but not when you’re tied to your coop like a prison warden. The beauty of automatic doors is the freedom and security they offer.
Benefits at a glance:
-
Predator Protection: Keeps your flock safe from nocturnal threats.
-
No More Manual Labor: No need to wake up early or rush home before dark.
-
Weather Resilience: No more braving storms or freezing winds just to open the coop.
-
Consistency: Chickens love routine. Auto-doors are always on time.
-
Vacation Friendly: Leave town knowing your chickens are still getting in and out safely.
For many, the door pays for itself in peace of mind. You reduce the chance of losing chickens to predators while also keeping them in a secure, temperature-controlled environment at night. That’s a win-win.
Not to mention, it adds a level of tech-savviness to your homestead. It’s one less thing to worry about in a hobby that can be unexpectedly time-consuming.
Types of Automatic Chicken Doors
When it comes to automatic chicken doors, one size doesn’t fit all. Different models suit different needs, depending on your coop setup, flock size, and level of automation desired. Let’s break down the most common types so you can choose the one that fits you like a glove.
1. Timer-Based Auto Chicken Doors
These doors work on a preset schedule. You set the times for opening and closing—say, 6:30 AM for opening and 8:00 PM for closing—and the system follows it religiously.
Pros:
-
Perfect for areas with unpredictable light conditions.
-
Great if your chickens follow a strict routine.
Cons:
-
Doesn’t adjust to seasonal daylight changes.
-
Needs occasional reprogramming as days get longer or shorter.
2. Light Sensor-Based Doors
These use photocells or light sensors to detect sunrise and sunset, opening the door when the sun comes up and closing it when it goes down.
Pros:
-
Adjusts automatically with the seasons.
-
More natural for the flock’s circadian rhythm.
Cons:
-
May malfunction on extremely cloudy days.
-
External lights (like porch lights) can interfere with sensor accuracy.
3. Hybrid Models (Timer + Light Sensor)
The best of both worlds. You can either let the light sensor do the work or set a timer override. Some models even allow custom calibration of light sensitivity.
Pros:
-
Offers maximum flexibility and control.
-
Great for advanced users who want precision.
Cons:
-
Can be more expensive.
-
Slightly more complex to program.
Choosing the right type really depends on your environment and how hands-off you want to be. If you’re a tech lover, go hybrid. If you live in a place with extreme weather shifts, timer-based might be your best bet.
How to Install an Automatic Chicken Door
So, you’ve bought an automatic chicken door—awesome! Now comes the fun (and slightly technical) part: installation. Luckily, most modern doors are designed for DIY setup and can be installed in under an hour with basic tools.
🧰 Tools You’ll Likely Need:
-
Screwdriver or drill
-
Screws (usually included)
-
Tape measure
-
Pencil or marker
-
Mounting brackets (if not pre-installed)
-
Spirit level (optional but helpful)
🔧 Step-by-Step Installation Guide (Based on User Manual)
-
Choose the Right Spot on Your Coop Wall
Find a flat, vertical section of your coop that’s easily accessible and free of obstructions. Make sure it's high enough off the ground to avoid water/snow buildup. -
Measure and Mark Door Frame
Use the door frame as a template to mark where the screw holes and the opening will be. Use a level to make sure it’s straight. -
Cut the Door Opening (if needed)
If your coop doesn’t already have an opening, you’ll need to cut one using a jigsaw. Match the opening size to the inner frame of the automatic door. -
Attach the Door Mechanism
Screw the door unit into place. Make sure the motor mechanism is upright and aligned with the track. Double-check it’s level. -
Install the Power Source
Depending on your model, connect either:-
AA batteries into the battery compartment, OR
-
Plug into a power outlet using the provided DC adapter, OR
-
Connect to a solar panel system.
-
-
Test the Door
Before sealing everything in place, run a manual open/close cycle. Ensure the door slides smoothly and doesn’t catch. -
Seal and Weatherproof
Use weatherstripping or silicone caulk around the edges to keep rain and drafts out. This step is crucial for extending lifespan.
⚠️ Safety Considerations
-
Keep children and pets away during installation.
-
Disconnect power when adjusting or repairing.
-
Avoid placing in areas where snow or debris can pile up.
By following these steps, you’ll have your auto chicken door up and running in no time—and your chickens will thank you for it!
How to Set an Automatic Chicken Door
Setting up the operation mode for your door is just as important as the physical installation. Modern auto chicken doors come with a digital control panel, allowing you to configure it exactly how you want it.
🕒 Timer Settings
Most models allow you to:
-
Set morning open time
-
Set evening close time
-
Add a delay buffer
Use the menu buttons to cycle through options. You may need to hold the “Mode” button for a few seconds to enter programming mode.
☀️ Light Sensitivity Settings
To adjust sensitivity:
-
Choose between low, medium, and high.
-
Higher sensitivity means the door will respond to lower light levels (darker).
This is useful for fine-tuning open/close times based on how light your backyard gets.
⚙️ Combining Both (Hybrid Mode)
Some doors allow:
-
Light sensor to control opening
-
Timer to control closing
or vice versa.
This gives you more customized control and is great for seasonal changes.
Make sure to test settings after configuration. Set the door into “Run” mode and observe for a day or two to see how it behaves.
How to Program an Automatic Chicken Door
Let’s dive into the actual button-pressing part. Depending on your model, the button names may differ slightly, but the general process remains similar.
🧭 Steps to Program Your Door
-
Enter Programming Mode
Hold the "SET" or "MODE" button for 3–5 seconds. The display should blink or show "PROG." -
Set Opening Time
Use the “+” and “-” buttons to adjust the hours and minutes. Press "SET" again to save. -
Set Closing Time
Repeat the process for the close time. -
Choose Sensor Mode (If Available)
Toggle between "TMR" (timer) or "LUX" (light sensor). Confirm selection with "SET". -
Exit and Test
Press "MODE" again to return to the home screen. Run a test cycle by manually pressing the open/close button. -
Observe for a Few Days
Watch how your door behaves with your chosen settings. Adjust if necessary.
📌 Pro Tip: Use Battery Backup
Even if you’re using a power adapter, install backup batteries. That way, your door won’t fail during a power outage.
How to Set Automatic Chicken Door Opener
Setting the opener correctly ensures your door works exactly when you want it to. Whether you’re using light sensor mode, timer mode, or a combination of both, it’s important to fine-tune the opener settings for reliability and safety.
🔩 Synchronizing Door and Motor
Before diving into setting specific times, make sure your door and motor are calibrated properly. Most doors do this automatically during the initial startup cycle, but it’s always good to double-check.
Steps:
-
Run a full open/close cycle manually.
-
Watch and listen for any grinding, lagging, or misalignment.
-
If the door doesn't fully open or close, use the "reset position" feature (usually by holding the SET button for 10 seconds) to recalibrate.
⏰ Configuring Morning & Evening Times
For timer-based models, you’ll need to:
-
Enter program mode (hold the MODE or SET button)
-
Set opening time (e.g. 06:30)
-
Set closing time (e.g. 20:00)
-
Exit and save
For light-sensor models:
-
Adjust the light sensitivity. Lower sensitivity opens later (requires more light), while higher sensitivity opens earlier (less light required).
Some advanced doors also let you set delay buffers, such as:
-
Close 30 minutes after sunset
-
Open 15 minutes after sunrise
This is ideal for late risers in the winter or avoiding early-night predator activity.
📘 Reference from User Manual
According to the user guide provided, the door includes a setting interface with multifunction buttons:
-
Long press the SET button to enter programming mode.
-
Use “+” and “-” to navigate options like "LUX MODE" or "TIMER MODE".
-
Confirm with short press of the SET button.
-
“RESET” option returns all values to factory default—handy if you get lost.
The display screen will show clear indicators like “OPEN,” “CLOSE,” “LUX” or “TIMER” to help guide you.
How to Reset an Automatic Chicken Door
Sometimes things go wonky. Maybe your door isn’t responding, your settings are a mess, or the motor has jammed. When all else fails, a hard reset can breathe new life into your system.
🔁 Common Reasons to Reset
-
Motor gets stuck halfway.
-
You changed batteries and the settings were lost.
-
You accidentally entered the wrong programming mode.
-
Light sensor settings aren’t triggering the door correctly.
🧾 Reset Process (General Instructions)
-
Hold the “RESET” button (or a combo like “SET + MODE”) for 10 seconds.
-
You’ll see a blinking screen or the display will turn off momentarily.
-
Once the reset completes, the display will return to factory settings.
-
Re-enter your open/close settings and mode.
🔐 Manual Reset from the User Manual
Based on the instruction PDF:
-
A recessed reset hole/button is located near the power input.
-
Use a paperclip or pin to press it.
-
Screen will show a “default” indicator after successful reset.
Reminder: Always recheck door alignment after resetting, as position memory may be lost.
How to Make an Automatic Chicken Door (DIY Option)
Feeling crafty? Making your own automatic chicken door is absolutely doable if you’re comfortable with basic tools and electronics.
🧰 What You’ll Need:
-
Linear actuator or motor with pulley
-
Light sensor (LDR) or digital timer
-
Power supply (solar or 12V battery)
-
Arduino or relay module for control
-
Sliding or hinged door
-
Weatherproof housing
⚒️ DIY Build Steps
-
Build the Door Frame
Use a wooden or plastic panel that fits snugly in your coop door. Attach sliders on the side or hinges at the top/bottom. -
Install the Motor
Position the motor above the door for vertical slide or beside it for swinging action. -
Add a Sensor or Timer
Wire the LDR (Light Dependent Resistor) or timer to trigger motor based on light intensity or scheduled time. -
Test the Mechanism
Power on the system and test open/close cycles. Add safety stop logic if using Arduino. -
Secure Everything in a Weatherproof Box
Ensure all electronics are sealed. Moisture kills circuits fast.
🧠 Pros & Cons
Pros:
-
Fully customizable
-
Cheaper than high-end commercial models
-
Fun project if you’re tech-inclined
Cons:
-
Time-consuming
-
Not as reliable as commercial units
-
Requires knowledge of circuits and code (if using Arduino)
How to Keep Your Automatic Chicken Door from Freezing
Winter brings special challenges. Freezing temperatures can cause your door to stick, jam, or stop working altogether. But don’t worry—there are ways to winterproof it like a pro.
🧊 Top Anti-Freeze Strategies
-
Use Lubricant
Spray silicone lubricant or Teflon-based dry lube on the sliding tracks. Avoid oil-based ones—they get sticky in the cold. -
Add Weather Seals
Apply weather stripping around the edges to reduce moisture ingress. -
Protect the Motor Housing
Use an insulated box or wrap to prevent the motor from freezing. -
Install a Low-Watt Heater Pad
Place a waterproof heating pad under the control unit. A thermostat can help regulate it automatically. -
Position the Door Properly
Avoid installing the door where snow drifts pile up. Place it on the sunny side of the coop if possible.
💡 Pro Tip:
Use a solar-powered door with a battery backup. Batteries maintain a steady power supply even if cold temps zap solar efficiency.
Keeping your door freeze-free not only protects your flock—it prevents motor strain and prolongs the life of the unit.
How to Open an Automatic Chicken Door Manually
Even the most reliable automatic chicken door might need a little manual intervention once in a while. Maybe you’re doing a coop inspection, or you need to let your chickens out early due to weather or travel plans. Either way, knowing how to manually open or close the door is an essential skill.
🖐 When Should You Use Manual Override?
-
Power failure (dead batteries or solar issues)
-
System malfunction or error codes
-
Extreme weather where automation might fail
-
Cleaning or maintenance access
-
Emergency situations
🔓 How to Manually Open/Close the Door
Most doors come with a manual override button or control interface. Here’s how to use it:
-
Locate the Control Panel
Look for buttons labeled “OPEN” / “CLOSE” or a single button that cycles between states. -
Press and Hold to Trigger Movement
A short press might activate a manual cycle. On some models, holding the button for 3–5 seconds engages a full open or close function. -
Use the Emergency Release (if equipped)
Some high-end doors feature a pull cord or knob you can use to manually lift the door. -
Turn Off Sensor Mode
Temporarily disable timer or light sensor mode to prevent the motor from overriding your manual action. -
Re-enable Automation After Manual Use
Once you’re done, always return the system to “AUTO” or “RUN” mode so automation resumes properly.
⚠️ Safety Tips
-
Never force the door open if it’s motorized—use the override button or follow the manual.
-
Always disconnect power when performing a physical manual open.
-
Keep your hands clear of sliding tracks and gears.
Being able to manually control the door gives you added peace of mind—and prevents you from being completely at the mercy of tech glitches or dead batteries.
When to Set an Automatic Chicken Door
Timing matters more than you think. Chickens are creatures of habit and their internal clocks are closely tied to sunrise and sunset. Setting your automatic door at the right time helps prevent stress and keeps your flock safe.
🌄 Ideal Open Time
-
In summer: Between 5:30 AM and 6:30 AM, depending on when the sun rises.
-
In winter: Between 7:00 AM and 8:00 AM, allowing light to build up.
Why delay slightly?
Opening the door right at first light can expose your flock to early-morning predators like raccoons, foxes, or hawks. A 15–30 minute buffer is often recommended.
🌆 Ideal Close Time
-
In summer: Around 8:30 PM to 9:00 PM
-
In winter: Around 4:30 PM to 5:00 PM
Ensure all chickens are inside before closing. Some breeds like to loiter outside longer than others, so observe your flock’s routine before finalizing door timings.
🌤 Seasonal Adjustments
-
In light sensor mode, the system adjusts automatically.
-
In timer mode, manually tweak settings every few weeks as daylight changes.
-
Hybrid modes allow light-triggered opening and timer-triggered closing, giving you the best of both worlds.
🔁 Pro Tip:
Some advanced doors even feature “Last In” delay options, which wait for the final chicken to enter before triggering the close command.
Getting your timing right improves both security and your flock’s well-being.
Where to Buy an Automatic Chicken Door
You’ve read all about them—now where do you actually get one?
🛒 Top Online Retailers
-
Pets Gear: Different selection, verified user reviews, fast delivery.
-
Tractor Supply Co.: Reliable rural supplier with farm-specific models.
-
Rural King: Good quality options, especially for larger coops.
-
Premier 1 Supplies: Trusted name in poultry equipment.
🌐 Best Brands to Look For
-
Pets Gear
-
Omelet Auto Door
-
Rural365
-
Run-Chicken
-
JVR Automatic Coop Door
Always choose a door that suits your climate and power source (solar, battery, or plug-in).
💰 Price Range Overview
| Type | Price Range | Best For |
|---|---|---|
| Basic Timer Door | $50 - $80 | Beginners, small coops |
| Light Sensor Models | $90 - $130 | Seasonal environments |
| Hybrid/Smart Doors | $130 - $250+ | Large coops, high automation |
| DIY Kits | $30 - $300 | Tinkerers & hobbyists |
📦 What’s Typically Included
-
Control unit
-
Door panel
-
Mounting screws
-
Battery case or power cord
-
Instruction manual
-
Some kits may include a protective cover
Buying from trusted vendors ensures customer support, warranty options, and easy returns if needed.
Why Is My Automatic Chicken Door Not Working?
So your door isn’t doing what it’s supposed to. Let’s go over common issues—and how to fix them—before you panic.
⚠️ Common Issues
-
Dead Batteries
-
Check and replace with fresh AA batteries.
-
-
Loose or Frayed Wires
-
Inspect all wiring connections. Reconnect if loose.
-
-
Blocked Tracks
-
Debris, snow, or poop can block sliding mechanisms.
-
-
Sensor Obstruction
-
Clean off dust or cobwebs from light sensors.
-
-
Faulty Motor
-
Listen for humming or grinding. You may need a replacement part.
-
-
Improper Settings
-
Reset and reconfigure time/light modes.
-
🔎 Troubleshooting Based on the Instruction Manual
-
Look for flashing error codes on the LED screen.
-
Use manual test mode to trigger door operation.
-
Perform a full reset and recalibrate motor positions.
🧰 Fix-It Checklist
-
✅ Power source okay?
-
✅ Motor responding?
-
✅ Tracks clean?
-
✅ Correct mode selected?
-
✅ Override switch off?
99% of issues can be fixed by a battery swap, reset, or track cleaning.
Why Won’t My Automatic Chicken Door Open?
This is probably the most stressful issue, especially if it happens first thing in the morning. A stuck door means a trapped (and anxious) flock.
🥶 Main Reasons It Won’t Open
-
Frozen or Stuck Mechanism
-
Lubricate tracks and check for ice buildup.
-
-
Power Failure
-
Dead batteries? Power cord unplugged?
-
-
Misconfigured Timer or Sensor
-
Check if the sensor is still in nighttime mode or if the timer wasn’t reset after a battery swap.
-
-
Obstructed Pathway
-
Debris or bedding inside the coop can jam the bottom.
-
-
Firmware Glitch
-
Reset and reprogram the control unit.
-
🔧 How to Fix It
-
Perform a manual override to open the door.
-
Check battery voltage (some units blink red when low).
-
Clean all sensors and tracks.
-
Reset the door (hold SET or press reset pinhole).
-
Observe operation after reset to ensure it's moving smoothly.
If the door still doesn’t respond, contact the manufacturer’s support. Most come with at least a 1-year warranty.
Maintenance Tips to Extend Lifespan
Want your door to last 5+ years? A little routine maintenance goes a long way.
🧼 Weekly Maintenance
-
Wipe the tracks clean
-
Check battery voltage or charge level
-
Ensure door opens and closes fully
🛠 Monthly Tasks
-
Inspect motor housing for moisture damage
-
Lubricate moving parts with silicone spray
-
Test override and reset buttons
🌦 Seasonal Tips
-
Add insulation or protection for winter
-
Move door if summer sun overheats the unit
-
Adjust timing for seasonal light shifts
💡 Bonus Tip: Log Your Settings
Keep a notebook or note on your phone with your current open/close settings. Makes resets easier!
Conclusion
An automatic chicken door is one of the best upgrades you can make to your chicken coop. It offers convenience, protection, and freedom—letting you care for your flock without being chained to their schedule.
Whether you're installing a brand-new unit, programming settings, troubleshooting issues, or even building your own, this guide should give you the confidence to take control of your coop like a pro.
Your chickens deserve the royal treatment—and with the right door, they’ll get it every single day, rain or shine.
FAQs
1. Can I use a solar panel for my automatic chicken door?
Yes! Many models are compatible with solar panels, just make sure the solar kit provides enough voltage and comes with a battery backup for cloudy days.
2. How long does the battery typically last?
With average daily use, quality AA batteries can last 6–12 months. Always keep a spare set around just in case.
3. Will the door still work during storms or cloudy days?
If you're using a light sensor model, very dark skies can affect opening. Timer-based doors are more reliable in bad weather.
4. Can predators trigger the door by movement?
Nope. The door responds to light or time—not motion. It won’t open just because something walks by.
5. Is it safe to leave the system unsupervised?
Absolutely. As long as it’s installed correctly and maintained, auto doors are very reliable and safe for daily operation.